Sunday, April 25, 2021

Easy and Delicious Air Fried Churros

These Air Fried Churros are incredibly easy to make, foolproof, and absolutely delicious. I tried several recipes and attempts until I made my own additions and got these perfect.

Kitchen Tools: Air Fryer, Mixer (Handheld or stand) Pastry Bags, a large star tip like this one, a rubber band, mixing bowls. shallow bowls, spatula, and tongs. 

    • Dough:
      • 1 cup water
      • 1/4 cup salted or unsalted butter, diced into small cubes
      • 1 Tbsp granulated sugar
      • 1/2 a teaspoon of ground cinnamon
      • 1/4 tsp salt (skip if you used salted butter already)
      • 1 cup all-purpose flour (scoop into a dry measuring cup then level the top with a knife)
      • 1 large egg
      • 1/2 tsp vanilla extract
      • Vegetable oil for spraying/greasing the fryer pan and churros.

      Topping:
      • 1/2 cup granulated sugar
      • 3/4 tsp ground cinnamon

      Frosting:
      Russian Buttercream Icing
      2 Tbsp of butter (softened but still cold)
      4 Tbsp of condensed milk (chilled)
      1/2 to 3/4 cup of powdered icing/confectioners sugar
      2 Tbsps of unsweetened cocoa powder (optional if you want a chocolate frosting instead) I prefer this one.


  • Directions:
  • Add water, butter, sugar, and salt (if using unsalted butter only) to a medium saucepan.  
    Stir this mixture and bring it to a boil over medium-high heat.
  • Pour in flour and reduce heat to medium-low. and cook. Stir constantly with a silicone spatula until the mixture comes together and it is mostly smooth. (Don't worry about a few lumps.) 
    The dough should also begin pulling away from the sides and form somewhat of a ball. Turn off the heat at this point.
    • Next, you'll want to wait until the dough cools down enough so that it's comfortable to touch and no warmer than lukewarm or room temp. I make the toppings at this point so that the dough can cool for at least 10 minutes.  
      For the topping mix together the remaining sugar and cinnamon in a shallow dish, and set aside. You can also use this to sprinkle the mixture on. 
      For the frosting, you want to use slightly softened butter. To accomplish this I place the butter in the microwave for 5 to 15 secs, checking it at 5-second intervals (it depends on your microwave wattage.) 
      The butter should be soft enough to press an indentation in using your finger yet still look solid and feel somewhat cold. (Room temperature butter I found is too soft for this recipe.)
      Whip the butter with a mixer on high until it becomes lighter in color. Add the vanilla extract. Then slowly spoon in chilled and canned condensed milk and continue mixing. ( I leave the can in the fridge overnight or at least a few hours before making this.) Having both the butter slightly soft and condensed milk chilled is essential for this frosting to come out super light and fluffy. 
      Once the milk is incorporated you can then add powdered sugar until you get the thickness and sweetness you desire. You can add in some unsweetened cocoa powder if you prefer a chocolate frosting. 

Now you can return to working with the churro dough after checking that it is cooled down enough. Using a spoon or your spatula, make a well in the middle of the dough (press in an indention until you have a small bowl-like shape.)

Crack the egg into the well and add the vanilla extract and cinnamon. Use a mixer on low to incorporate everything. At first everything will start to seperate, but if you keep mixing for a few minutes more until you have a smooth slightly sticky dough. 

Place the dough into an extra-large pastry bag with a star tip. 

Spray or grease your air fryer pan/tray. Squeeze out about 4-inch strips of dough. Twist and press the tip down at the end to release and separate the dough. Some people use kitchen scissors and snip the dough off instead. 

Repeat until your pan is filled leaving about 1/2 inch between each churro. They don't expand very much so you don't need a ton of space around them. But you want the air to be able to circulate enough around each churro so it comes out crispy. 

I like to give brush or spray some more vegetable oil on top of the churros because it gives something for the cinnamon sugar to adhere to later. 

You will have enough batter to make about three to four trays worth of churros.

Set your air fryer to 380 Fahrenheit and 10 minutes.

Once the churros come out, you can sprinkle them and/or toss them in a bowl of sugar and cinnamon while warm. I find a tong helps.

I hope you enjoy this recipe! 

Please let me know in the comments if you have any questions. Also if you make the recipe I would love to know how it turned out.  


Monday, March 15, 2021

Delicious Blackberry Pie


🥧 My boo’s favorite kind of pie, so I learned how to make it two Thanksgiving’s ago. ðŸ˜‹ Since we loved how it came out we made it again last November and we will now include it every year. Posting in honor of #piday


INGREDIENTS:


  • 2 pre-made pie dough rounds (if you are vegetarian watch out as some brands are made with lard) or make your favorite recipe from scratch. I like this one linked here.

  • 5 cups blackberries fresh or frozen; if frozen, make sure to thaw and drain them

  • 2/3 cup granulated white table sugar plus a little more for sprinkling

  • 1 tablespoon lemon juice

  • 4 tablespoons cornstarch

  • 1 egg for eggwash


DIRECTIONS:


  • Preheat your oven to 425°F.
  • Take one of your two pie crusts and place it in a 9” pie plate (standard size, not deep dish). Brush with egg wash. Then place it back in the fridge for 30 minutes.

  • Take the other piece of pie crust, place it lightly floured cutting board and slice it into strips, about 1/2-3/4” in width. You can use a pizza cutter or a knife. Then place the board with the sliced dough in the fridge.

  • Meanwhile make the filling by mixing the berries, sugar, lemon juice, and cornstarch in a bowl. If using frozen berries, make sure they are thawed and drained before using them so your pie doesn’t have too much liquid.
  • Place the berry mixture into the chilled pie crust.

  • Remove the sliced crust from the refrigerator. Starting at one edge of the pie, use every other strip from the cut slices and place them equal distance from each other on top of your pie leaving some space between them. 

  • Starting at one end of the pie, fold back every other strip and place the shortest remaining strip perpendicular to the strips already on the pie. Lay the folded strips flat.

  • Now, working at the opposite end of the pie, fold back the strips you didn’t fold back the first time. Take the next smallest strip of crust and place it parallel to the strip you just put down. Re-lay the folded strips flat. Continue this process until all the crust has been used. Crimp the edges of the pie as desired.

  • Brush the crust with egg wash and sprinkle sugar on top. Bake on a cookie sheet (in case of spillover) for 10 minutes at 425°F then reduce the oven temperature to 350°F for an additional 35-45 minutes until some of the crust becomes golden brown.

  • Cool completely before slicing by placing the pie pan on a rack or a cool stove. This helps the pie set instead of becoming a runny mess. Once cooled I find that it’s best to chill the pie for a few hours in the refrigerator before slicing it. Since I make my pies the day before Thanksgiving I keep them in the fridge overnight until I serve them the next day. Of course, many people prefer their pie warm so you can also heat a slice up in the microwave for a few seconds, (But no longer than 30 seconds). 

  • Serve with ice cream and/or whipped cream, for garnish.


    We serve our pie with yummy Breyer’s Vanilla Bean Lactose-Free Ice Cream. I hope you enjoy this delicious blackberry pie recipe!

Sunday, June 14, 2020

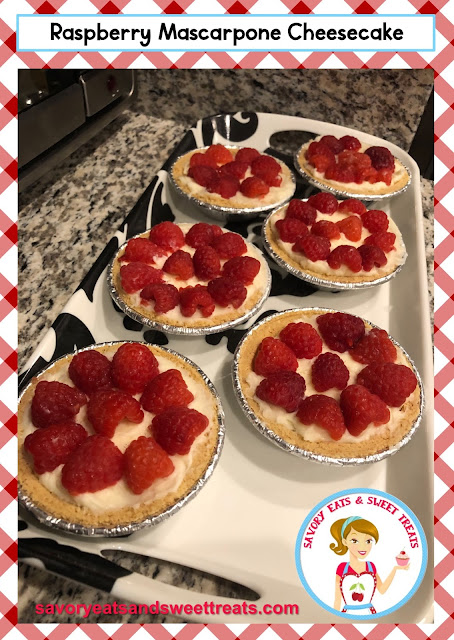
No Bake Raspberry Mascarpone Mini Cheesecakes

This recipe is taken from one of my old blog posts on my Teacher Ms H blog. I thought I would re-share it here to get things started and not have an empty blog. I hope to share more recipes with you here soon as cooking and learning about food are favorite hobbies of mine.

Raspberry Cheesecake


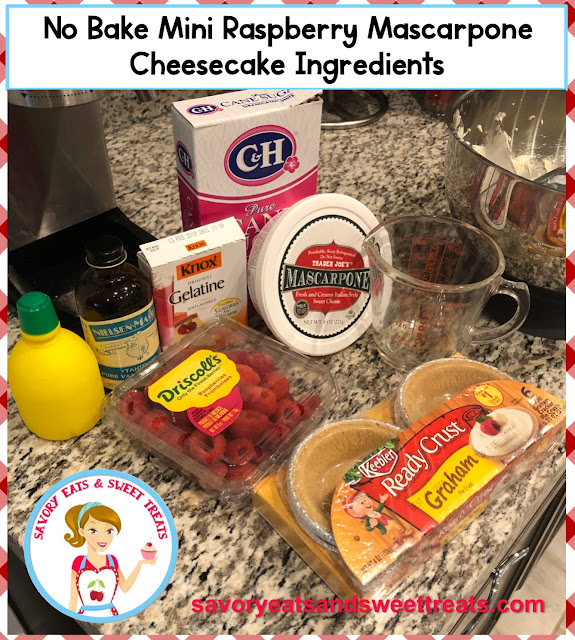
I made these delicious no bake mini cheesecakes with an 8 oz. container of mascarpone, a sweet and creamy Italian cheese similar to cream cheese but not as thick as it resembles smooth ricotta. 

Mascarpone can be hard to find at regular markets, but Trader Joe's does carry it as well as at Italian grocery stores. If you can't find mascarpone just use a regular 8 oz block of cream cheese. 

First, I heat a 1/4 cup of water in the microwave for 30 seconds using a small glass pyrex picture or you can use a mug. 

Then, I add half of one envelope of gelatin to water and stir quickly so it dissolves well and their are no lumps. Then I add 1/2 teaspoon of real vanilla extract and a few drops of lemon juice.  

Next, in a separate mixing bowl I spoon the mascarpone in and add a 1/2 cup of white granulated (table) sugar. I use a hand mixer to cream the sugar and soft cheese together. 

Then, I slowly pour in the gelatin mixture while keeping the blender on low speed, until thoroughly incorporated. I use a small narrow spatula to load this into to each small graham cracker pie crust from Keebler.

Raspberries are my favorite way to tops these, but you can also try different toppings include chocolate chips.

Next, I chill these in the fridge for two hours or in the freezer for one hour if I have space available. 

This recipe makes exactly enough for the six mini graham crackers pie crusts that come pre-packaged. If you want to make more just double the recipe and buy another set of graham cracker pie crusts.   

Mmmm! These were so rich in flavor and way creamier than regular cheesecake. Also tested and approved by my biggest fan. I hope you enjoy my first recipe post here!


SaveSave
SaveSave
SaveSave
SaveSave
SaveSave
SaveSave